Navidad/Christmas @ #rstats
Intro to/a rayrender
For the tutorial in English go to Section 2.
Tutorial en español
Esta Navidad las Rladies de Querétaro hicieron un concurso para realizar un árbol de Navidad con R y decidí participar. Esta vez no quería hacer el típico arbolito con ggplot2 así que decidí probar otra tecnología: rayrender.
rayrender es una librería para crear imágenes 3D mediante trazado de rayos (raytracing). No es la mejor opción open source para la tarea pero ¡hey está en R!
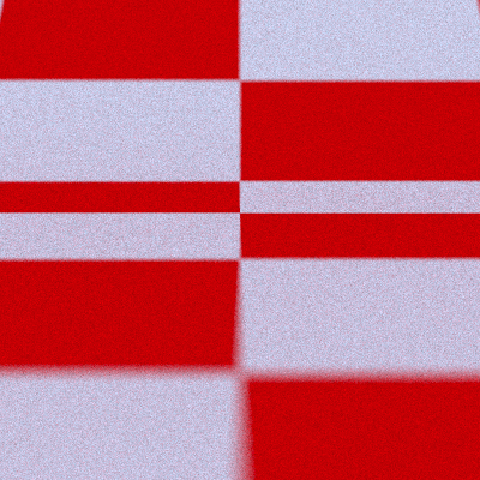
La forma en la que rayrender funciona es consturyendo una escena y a partir de ésta agregar objetos a la escena. Podemos empezar con una escena vacía de estudio fotográfico:
library(rayrender)
scene_test <- generate_studio(depth = 0.2,
                         material = diffuse(checkercolor = "red"))
Para poder ver previsualizar la escena se utiliza render_scene:
render_scene(scene_test,
             samples = 100, #Muestras (+ muestras menos ruido)
             preview = T,   #Si quieres previsualizar la escena antes de calcular
             parallel = T   #Si realizar el cómputo en paralelo
             )
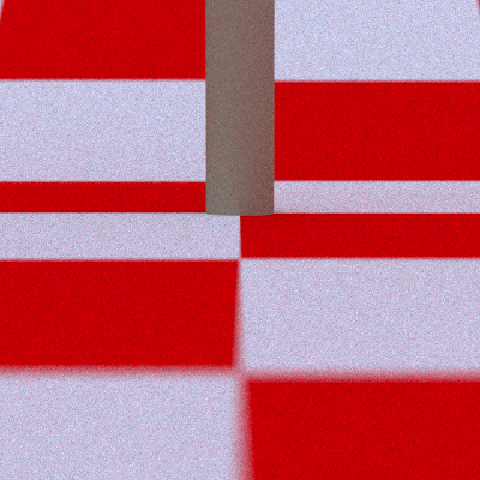
Sobre la escena podemos agregar objetos con add_object. En particular podemos agregar un cilindro para el tronco especificando sus coordenadas así como el material:
scene_test <- scene_test |>
  add_object(
    cylinder(
      x = 0,
      y = 0,
      z = 0,
      radius = 0.25,
      length = 10,
      material = diffuse(color = "#725c42")
    )
  )
Hay diferentes materiales, por ejemplo metal, cabello hair, luz light, cristal dielectric, etc (la lista completa en el apartado materials) por lo que si quisiéramos hacer nuestro árbol de cristal bastaría cambiar el material:
scene_metal <- scene_test |>
  add_object(
    cylinder(
      x = 0,
      y = 0,
      z = 0,
      radius = 0.25,
      length = 10,
      material = metal(color = "#725c42")
    )
  )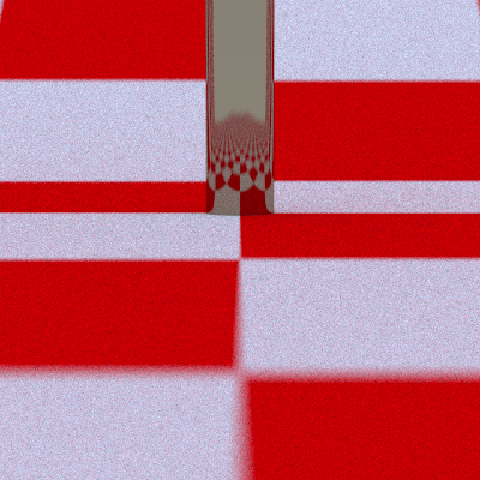
Podemos cambiar la perspectiva de la cámara ajustando manualmente y dando p para obtener las coordenadas y luego imputarlas en el render:
render_scene(scene_metal,
             samples = 100,
             preview = T,
             parallel = T,
             lookfrom = c(50.10, 7.25, 60.13), #Dónde está la cámara
             lookat   = c(1, 5, 0), #Dónde está viendo la cámara
             aperture = 0.5, #Apertura
             fov = 17,
             focal_distance = 77.66, #Distancia focal
             iso = 400, #Sensibilidad "del rollo fotográfico" a la luz
             clamp_value = 10
             )
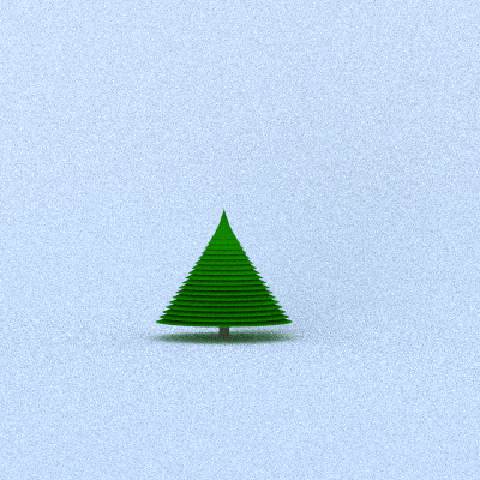
Sobre nuestro árbol podemos agregar conos verdes. Agregamos varios conos en un loop para darle mayor figura. Lo pondremos sobre un nuevo fondo (blanco) y con el tronco que hicimos previamente usando diffuse:
scene <- generate_studio(depth = 0.2) |>
  add_object(
    cylinder(
      x = 0,
      y = 0,
      z = 0,
      radius = 0.25,
      length = 10,
      material = diffuse(color = "#725c42")
    )
  )

#Conos
for (i in seq(1, 10, length.out = 20)){
  scene <- scene |>
    add_object(
      cone(
        start  = c(0, 6 - i/2, 0),
        end    = c(0, 6 - (i/2 - 1), 0),
        radius = i/3,
        material = diffuse(color = "darkgreen")
      )
    )
}
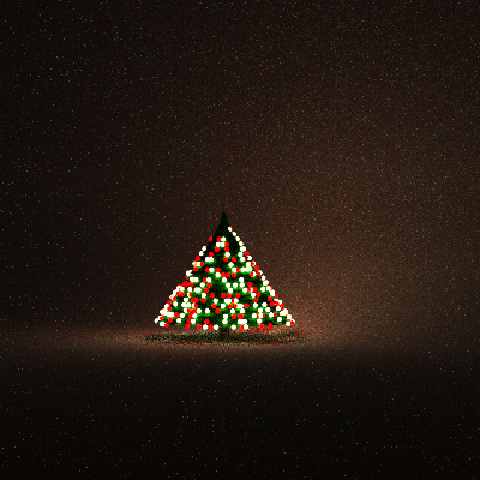
Finalmente agregamos esferas luminosas de dos colores distintos: amarillas y rojas sobre las superficies de los conos aleatoriamente:
set.seed(27522)
#Esferas luminosas
for (i in seq(1, 10, length.out = 20)){
  #Esferas rojas
  for (k in runif(2*i, 0, 2*pi)){
  scene <- scene |>
    add_object(
      sphere(
        radius = 0.1,
        y = 6 - i/2,    #Altura de la esfera
        x = cos(k)*i/3, #Coordenadas polares para superficie de cono
        z = sin(k)*i/3,
        material = light(color = "red", intensity = 5)
      )
    )
  }
  #Esferas amarillas
  for (k in runif(2*i, 0, 2*pi)){
  scene <- scene |>
    add_object(
      sphere(
        radius = 0.1,
        y = 6 - i/2,    #Altura de la esfera
        x = cos(k)*i/3, #Coordenadas polares para superficie de cono
        z = sin(k)*i/3,
        material = light(color = "#f8d568", intensity = 5)
      )
    )
  }
}
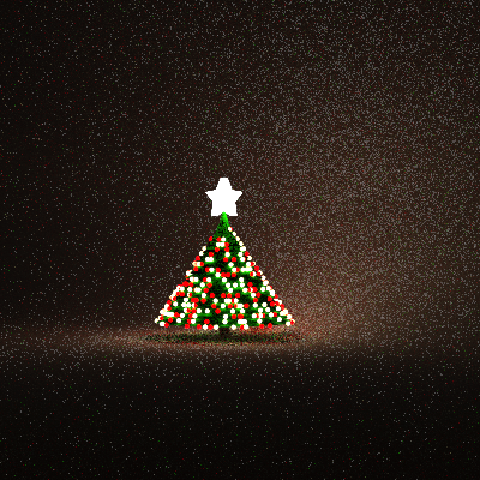
La estrella se agrega hasta arriba con un polígono extruded_polygon que permite diseñar figuras.
#Adaptado de la estrella de https://www.rayrender.net/index.html
angulos  <- seq(0, 2*pi, length.out = 11)
x        <- rev(c(rep(c(1,0.5), 5), 1)) * cos(angulos)
z        <- rev(c(rep(c(1,0.5), 5), 1)) * sin(angulos)
poligono <- data.frame(x = x, z = z)
estrella <- rbind(poligono, 0.8*poligono)

#Agregamos la estrella luminosa a la escena
scene <- scene |>
  add_object(
    extruded_polygon(
      estrella,
      top = -0.5,
      bottom = -1,
      y = 7,    #Altura
      z = 0.75, #Centrar
      angle = c(90, 0, 90),
      material = light(color = "white")
    )
  )
Una vez que está listo nuestro árbol nos preparamos para renderizarlo con suficientes muestras para eliminar todo el ruido:
Éste proceso tarda varias horas
png("arbolito.png")
render_scene(scene,
             width = 500,    #Ancho en pixeles
             height = 500,   #Alto en pixeles
             samples = 1000, #Suficientes muestras!
             preview = F,
             parallel = T,
             lookfrom = c(50.10, 7.25, 60.13),
             lookat   = c(1, 5, 0),
             aperture = 0.5,
             fov = 17,
             focal_distance = 77.66,
             iso = 400,
             clamp_value = 10
             )
dev.off()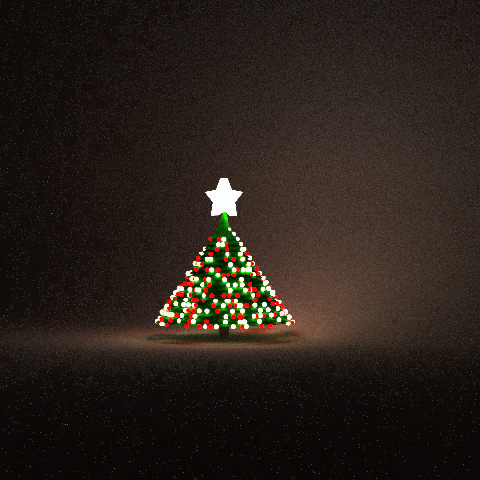
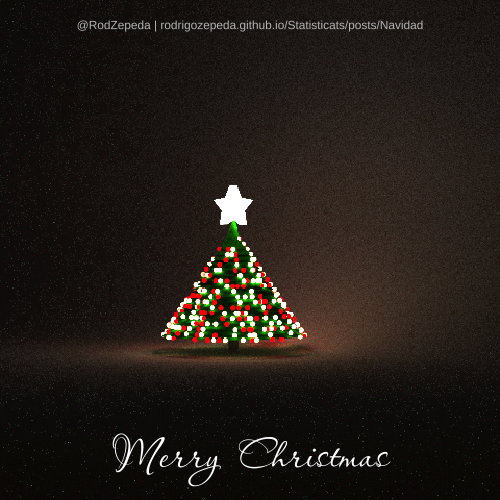
Finalmente al arbolito le agregamos texto de Feliz Navidad
library(png)
library(showtext)
library(cowplot)
library(ggplot2)

#Descarga de la fuente Passions Conflict
font_add_google("Passions Conflict", "pconflict")
showtext_auto()

#Leemos la imagen
arbol <- readPNG("arbolito.png")

drawplot <- ggdraw() +
  annotation_raster(arbol, xmin = 0, ymin = 0, xmax = 1, ymax = 1) +
  geom_text(aes(x = 0.5, y = 0.1, label = "Feliz Navidad"), color = "white",
            family = "pconflict", size = 15) +
  geom_text(aes(x = 0.5, y = 0.95,
                label = "@RodZepeda | rodrigozepeda.github.io/Statisticats/posts/Navidad"),
            color = "gray75",
            size = 3)
ggsave("arbolito_navidad_2022_es.png", drawplot, dpi = 100, width = 500, height = 500, units = "px") 
Tutorial in English
Para el tutorial en español ve a Section 1.
This Christmas Rladies Querétaro created a contest. One was to build a Christmas tree in R. I decided to participate. This time I didn’t want to do the typical ggplot2 tree so I decided to test another technology: rayrender.
rayrender is a library to create 3D images using raytracing. This is not the best open source option for this task, but hey, it’s in R!
The way rayrender works is by building a scene and adding objects to it. We can start with an empty study scene:
library(rayrender)
scene_test <- generate_studio(depth = 0.2,
                         material = diffuse(checkercolor = "red"))
To preview the scene use render_scene:
render_scene(scene_test,
             samples = 100, #More samples less noise
             preview = T,   #To preview the scene (before calculating)
             parallel = T   #Compute in parallel for extra speed
             )
We can add different objects onto the scene with add_object. In particular, we can add a cylinder for the tree trunk as well as its coordinates:
scene_test <- scene_test |>
  add_object(
    cylinder(
      x = 0,
      y = 0,
      z = 0,
      radius = 0.25,
      length = 10,
      material = diffuse(color = "#725c42")
    )
  )
There are different materials (e.g. metal, hair, light, (crystal) dielectric, etc see materials). If we wish to make our tree metal we can just change the material:
scene_metal <- scene_test |>
  add_object(
    cylinder(
      x = 0,
      y = 0,
      z = 0,
      radius = 0.25,
      length = 10,
      material = metal(color = "#725c42")
    )
  )
We can shift the camera’s perspective by manually adjusting and obtain the coordinates with p. These coordinates can be inputed into the render:
render_scene(scene_metal,
             samples = 100,
             preview = T,
             parallel = T,
             lookfrom = c(50.10, 7.25, 60.13), #Where camera is
             lookat   = c(1, 5, 0), #What is camera watching
             aperture = 0.5,
             fov = 17,
             focal_distance = 77.66,
             iso = 400, #Sensitivity to light
             clamp_value = 10
             )
We can add green cones to our tree. We do that with a for loop. We’ll put that tree over a white background and with the previous trunk we had using diffuse:
scene <- generate_studio(depth = 0.2) |>
  add_object(
    cylinder(
      x = 0,
      y = 0,
      z = 0,
      radius = 0.25,
      length = 10,
      material = diffuse(color = "#725c42")
    )
  )

#Cones
for (i in seq(1, 10, length.out = 20)){
  scene <- scene |>
    add_object(
      cone(
        start  = c(0, 6 - i/2, 0),
        end    = c(0, 6 - (i/2 - 1), 0),
        radius = i/3,
        material = diffuse(color = "darkgreen")
      )
    )
}
Finally, we add light spheres of two colors: yellow and red. These go randomly over the cone’s surface.
set.seed(27522)
for (i in seq(1, 10, length.out = 20)){
  #Red spheres
  for (k in runif(2*i, 0, 2*pi)){
  scene <- scene |>
    add_object(
      sphere(
        radius = 0.1,
        y = 6 - i/2,    #Sphere height
        x = cos(k)*i/3, #Polar coordinates for the cone's surface
        z = sin(k)*i/3,
        material = light(color = "red", intensity = 5)
      )
    )
  }
  #yellow spheres
  for (k in runif(2*i, 0, 2*pi)){
  scene <- scene |>
    add_object(
      sphere(
        radius = 0.1,
        y = 6 - i/2,
        x = cos(k)*i/3,
        z = sin(k)*i/3,
        material = light(color = "#f8d568", intensity = 5)
      )
    )
  }
}
We add an extruded_polygon for the star:
#Adapted from the star at https://www.rayrender.net/index.html
angulos  <- seq(0, 2*pi, length.out = 11)
x        <- rev(c(rep(c(1,0.5), 5), 1)) * cos(angulos)
z        <- rev(c(rep(c(1,0.5), 5), 1)) * sin(angulos)
poligono <- data.frame(x = x, z = z)
estrella <- rbind(poligono, 0.8*poligono)

#Add the luminous star
scene <- scene |>
  add_object(
    extruded_polygon(
      estrella,
      top = -0.5,
      bottom = -1,
      y = 7,    #Altura
      z = 0.75, #Centrar
      angle = c(90, 0, 90),
      material = light(color = "white")
    )
  )
Once our tree is ready we render it with enough samples to eliminate the noise:
This process takes several hours
png("arbolito.png")
render_scene(scene,
             width = 500,    #Pixel width
             height = 500,   #Pixel height
             samples = 1000, #Enough samples
             preview = F,
             parallel = T,
             lookfrom = c(50.10, 7.25, 60.13),
             lookat   = c(1, 5, 0),
             aperture = 0.5,
             fov = 17,
             focal_distance = 77.66,
             iso = 400,
             clamp_value = 10
             )
dev.off()
Finally we add Merry Christmas text to the tree
library(png)
library(showtext)
library(cowplot)
library(ggplot2)

#Download Passions Conflict from google fonts
font_add_google("Passions Conflict", "pconflict")
showtext_auto()

#Leemos la imagen
arbol <- readPNG("arbolito.png")

drawplot <- ggdraw() +
  annotation_raster(arbol, xmin = 0, ymin = 0, xmax = 1, ymax = 1) +
  geom_text(aes(x = 0.5, y = 0.1, label = "Merry Christmas"), color = "white",
            family = "pconflict", size = 15) +
  geom_text(aes(x = 0.5, y = 0.95,
                label = "@RodZepeda | rodrigozepeda.github.io/Statisticats/posts/Navidad"),
            color = "gray75",
            size = 3)
ggsave("arbolito_navidad_2022_en.png", drawplot, dpi = 100, width = 500, height = 500, units = "px")